

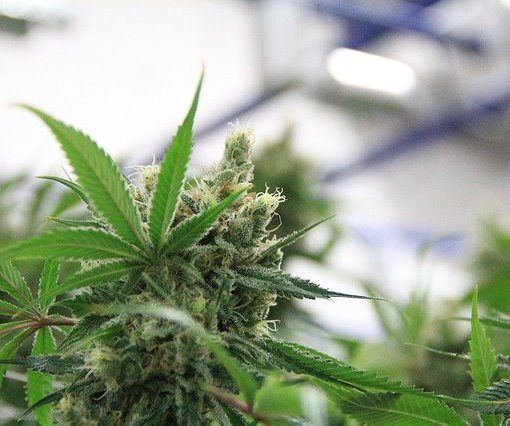
 Growing weed. You can get spectacular cannabis plants with a very limited budget by following these instructions

Growing weed. To get the best marijuana in the only thing you should spend your money is in good seeds because the rest you can produce yourself with a very limited budget. But we insist that you should never risk wasting your time growing seeds of whose origin and quality you are not absolutely sure. For a short time it takes to complete a crop, in the end you will have spent months and work on some seeds that may give marijuana of the worst quality. Not worth it.
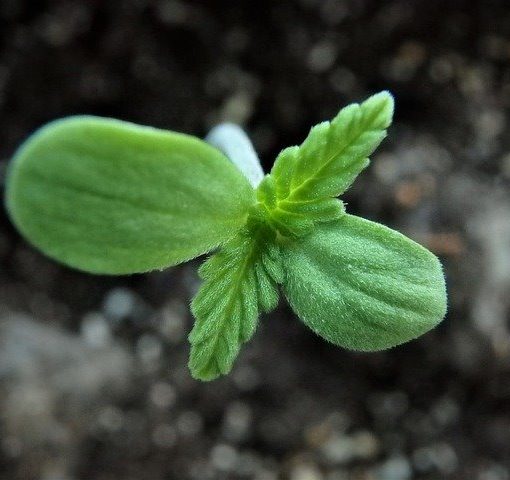
Seeds or cuttings?

Photo: KETAMA SEEDS
The option is up to you. The only thing we can tell you, just to advise you to buy quality seeds, is that the plants that come from seeds are larger and more productive than those that come from cuttings.
But the good thing about cuttings is that they come from a mother plant that has been selected for its best qualities; qualities that stand out above the others, either in quality, either in production or in both.
If you decide to start from cuttings, they will recommend that you use a root stimulant. It is a great idea but it is also true that they are not very cheap; At least the high quality ones. We are going to give you a couple of tricks that will serve you very well and that will hardly cost you money and are even free.
Honey
When you cut the cuttings of the mother plant immediately introduce the stem (where you cut) in honey. It does not need to be quality honey. Cheaper honey is just as good for making cuttings. Logically, the piece of the stem that you have introduced into the honey is impregnated with it. Enter the part of the cutting that is impregnated with honey in water and then put it in the substrate you have chosen for the crop. It never fails! But of course do not spend money on buying a quality honey. As we have already told you, the cheapest is equally effective. Honey has antibiotic properties and when used for cutting you guarantee that your cuttings remain free of viruses and diseases.
Weeping willow tea
If you have a weeping willow tree near your residence, take a medium-sized branch (between 2 and 3 centimeters in diameter) and cut it into pieces about 5 centimeters long. Put them in water and let them stand for two or three days. When you cut the cuttings of the mother plant, put them a few minutes in that infusion of weeping willow and then put them directly on the cultivation substrate. If you make a good amount of this tea, which is highly recommended since it is free, make the first irrigation with the infusion water. You can be sure that very soon your cuttings will begin to develop roots.
Vitamin B ampoules
In pharmacies you can find for a very little money some ampoules of a vitamin B vitamin complex called Benerva. Mix three or four ampoules of Benerva for each liter of water and when you cut the cuttings of the mother plant, introduce the lower part into the water with Benerva and then put them in its culture substrate.
Substratum
Actually I think that the substrate is one of the elements of good cultivation in which it is worth investing some money. It is not that it is not possible to do it at home. But it is somewhat cumbersome. In any case, the stupidest thing you can do is have good seeds and grow them in a bad substrate. If you grow a good seed properly, at the end of the season you can get about 900 grams of the best marijuana. Therefore, spending 10 Euros in a 50 liter bag to get a substrate of the best quality is the smartest.
You have to keep in mind that a very good substratum bought at a normal plant store costs less than any substratum bought at a cannabis store. The only thing that is important to keep in mind is that you should never buy substratum that is made with pine bark because it contains tannins that affects cannabis negatively.
And finally, remember that the PH of the substratum you buy must be neutral (7.00) or even better, slightly acidic (between 6.00 and 6.5).
However, if you do not have that money we are going to give you some tips to replace the best substrate with one that although it is inert (does not contain nutrients), the cannabis plant likes it very much because it is very loose: river sand.
Indeed, river sand, which is used to mix with cement and manufacture concrete, is a very cheap substrate and works very well whenever you fertilize plants regularly. A good trick for consistency is to mix the sand with compost in a ratio of 3/1. That is, 3 parts of sand and 1 part of compost. The compost must be of quality and in any case, it is very cheap. The compost not only gives consistency to river sand; It also provides nutrients.
In any case, what you should never do is use land from your garden, however good it may be. As we have said on cannabisground.com, cannabis’s weak point is its root system. The roots have no strength to penetrate the substrate if it is not very loose.
Making your own substrate
If you decide to make your own substrate, the best way is to do it as we indicate. Make a large hole in mother earth for each plant you are going to grow. I speak of a hole of approximately 50 liters in volume. You can also use large pots. But large pots are not free.
Put a layer of about 2 or 3 centimeters of gravel at the bottom of each hole or pot to drain. Then put a layer of the same height of pieces of cardboard.
Immediately on top of the cardboard put a 20-centimeter layer of river sand mixed with dried leaves or newspaper paper cut into small pieces. On top of this layer put another layer of dry straw. Be careful, do not confuse dry straw with hay since the hay is green straw that contains seeds that could germinate at the same time that you are growing your cannabis plants. And finally, on top of this last layer put another of about 10 centimeters of compost mixed with river sand and straw.
It is important to water the mixture for a week before putting the seeds or seedlings because the straw will ferment and can reach too high temperatures capable of killing the plant.
Compost
Homemade composting is one of the best ideas that can be used for growing any plant. As we have said, it is a somewhat cumbersome process that also takes months to get a good quality one. Therefore, it is best to buy it already made in a plant store. With very little you add to your substrate is enough.
Even so, if you live near some forest or land with deciduous trees, if you approach anyone’s base and dig a little just under the dead leaves, you will see that there is a very black earth that gives off a very pleasant smell. That is the best compost. You can pick up the compost that is in the first 3 or 5 centimeters of the surface and take it to your crop. It is easy, cheap and very effective.
Homemade growth fertilizer
Among all the homemade fertilizers for the growth phase, the Nettle Purin stands out. Nettle Purin is a bio-stimulating homemade extract that increases the development of plants and reinforces natural defenses. It is one of the most used ecological remedies in agriculture to strengthen plants and also fight insect and fungal pests. Nettle slurry is one of the best fertilizers.
It is a powerful repellent to scare off the aphid, the white fly, the crickets and the red spider. In addition, it has antiseptic and bactericidal properties thanks to its high content of formic acid.
Nettle slurry produces stronger plants due to its high content of minerals and microelements. These elements include: iron, phosphorus, magnesium, calcium, silicon, trace elements and vitamins A and C. All these elements prevent the development of chlorosis and wilting, increase plant defenses and make them more resistant to fungi of the type oídio and mildew.
It should also be noted that it also increases the growth of plants and their roots due to their high content of mineral salts and organic acids. Nettle purine improves the structure of the earth, absorbs excess iron and nitrogen and favors photosynthesis thanks to the carbonic gas generated by its bacteria.
It also increases the activity of microorganisms such as bacteria, which is essential for our substrate.
To do it at home, the first step is to take a kilo of nettle before it has begun to bloom. Once we have a kilo of nettle, we put it in 10 liters of water and let it macerate for approximately 10 days, removing the slurry two or three times a day.
When the macerate is ready, it should be filtered and stored in containers that NEVER have to be copper and / or metal in general since it kills the microorganisms, and always in a dark place. The container can be a bottle or a bottle, made of glass or plastic.
Once the solution in bottles is ready, it should be applied every 10 or 15 days, in a proportion of 1 liter of solution (nettle slurry) for 20 of water. With this proportion we will obtain an EC of approximately 1.00. Homemade nettle slurry is simple to make and is also an ecological and cheap option to keep your plants strong and healthy.
Homemade fertilizers for the flowering phase
Banana tea
Banana tea contains a lot of potassium and to do so we will only need 4 banana peels and 2 tablespoons of brown sugar.
We boil the peels and sugar in a liter of water for about 3-5 minutes. Then we let cool and strain. To this liter of we add another two liters of water and we already have 3 liters of banana tea to be able to throw to our plants.
Brewer’s yeast tea
To make the brewer’s yeast tea, mix in a liter of water a tablespoon of yeast. This is enough to have an excellent flowering fertilizer and we can use it with our plants.
Guano tea
To prepare our guano tea, we will first have to get the bat guano, which we can buy at any store for plants. Then we mix a tablespoon of guano with two liters of water. Let the guano rest in water for a few days and we have it ready for use. This tea can be used mixed with water every 15 days.


